.png)
The Snuggly baby gift that doubles as a keepsake
- Dec 14, 2022
- 6 min read
Updated: Jan 9, 2024

Baby gifts are just the best, amiright? I especially love crafting for babies and one of my favorites is this Baby Stats Elephant. It's quick and easy, especially with the free svg file at the bottom of this post. All you have to do is plug in the information about the baby you are gifting it to and it's ready to cut out with your Cricut or Silhouette. Iron the design onto a soft plush that's only about $10 on Amazon and you’re done! Yep, only $10 for a cute stuffed animal that parents and children will adore. I love to pair the elephant with a crocheted blanket or an adorable outfit.
Watch the video here:
Supplies for a baby stats elephant
This post may contain affiliate links, which means I get a commission if you decide to make a purchase through my links, at no extra cost to you.
heat transfer vinyl – Siser EasyWeed is my favorite
Cricut EasyPress Mini or iron
a ruler or measuring tape
Cricut or Silhouette
Cricut EasyPress Mat or ironing board
Get started making a baby stats elephant
Use the link at the bottom to download the png file, or if you are a subscriber use the password at the bottom of one of my newsletters to go into my Resource Library located on my homepage.
If you click on the link at the bottom, the next step is to go into your email, open the message from me and press the confirm button to subscribe. This will open the image file. Right click on the image and then click Save As. Remember where on your computer you are saving the file so you can access it in the next step. My computer automatically saves these types of files in my Download folder.
Open Cricut Design Space and click on New Project. Within that project, click on the upload button on the left and browse to go to the image file you just downloaded from my email. Once you have selected it, Cricut Design Space will open a window that says "Prepare to Upload". Click the Upload button on the lower right and you're ready to go!
(If you need more help uploading a cut file to Cricut, click here for a video tutorial that explains the process.)

Once you have it uploaded, click on it and press add to canvas in the lower right.

Once it loads, click the image and then press the ungroup button on the upper right of the screen. This separates each of the elements of the image so you can edit them individually.

For the elephant’s right ear, add in the baby’s information to the design. All you have to do is click text on the left to add a text box, and type in the info for each section.

Use the font option at the top of the screen to play around with fonts until you like the look of it and then use that same font for each section. I used Cricut Sans for my font.
Use the arrows at the corners of the text boxes to size text up or down to make it the right size to fit the areas. Move things around if you need to until you like how the design looks.

For the left ear, I clicked on the word text on the left-hand side and typed the first initial of the baby’s name. I changed the font to High Tower Text.
Then I clicked the text option again to add her full name. Once again I looked at different fonts until I found one I liked which was Abiyah. I centered the full name on top of the initial.
Along the way I changed the colors in my design so Design Space could place the right parts of the design on the right mats for the cutting process.

Use your ruler or measuring tape to determine how big to make the design. I cut my right ear design at 1.74 inches wide by 2.55 inches tall. The left ear I made at 1.75 inches wide by 1.86 inches tall although these measurements might be different depending on how long the name you are using is.

Select the entire design for one ear and change the measurements so the design will fit. Do this by going to the top of the screen where you will a section labeled size. Within this section are two boxes – the width of the design (w) and the height (h). These boxes will be automatically set to change proportionally to each other. This means if you change the width it will also change the height and vice versa to keep the design to the same proportions.

If you want to make it wider but not taller etc., just click the little padlock above it which will unlock the measurements. Now when you change one of the measurements the other will stay the same.

Once it's the right size, move the feet and heart part of the design out of way, select all of your baby stats and the white heart at the top and click the combine and then the weld option on the right. This groups the items together so they will cut exactly how you see it on the canvas instead of as separate items you would have to manually move around to iron on.

Once you have it looking perfect and sized correctly, it's time to cut your heat transfer vinyl aka htv. Place the htv on your cutting mat with the shiny side DOWN. A regular green mat will work for this if you are using a Cricut.

Click Make It from the upper right corner of Design Space.
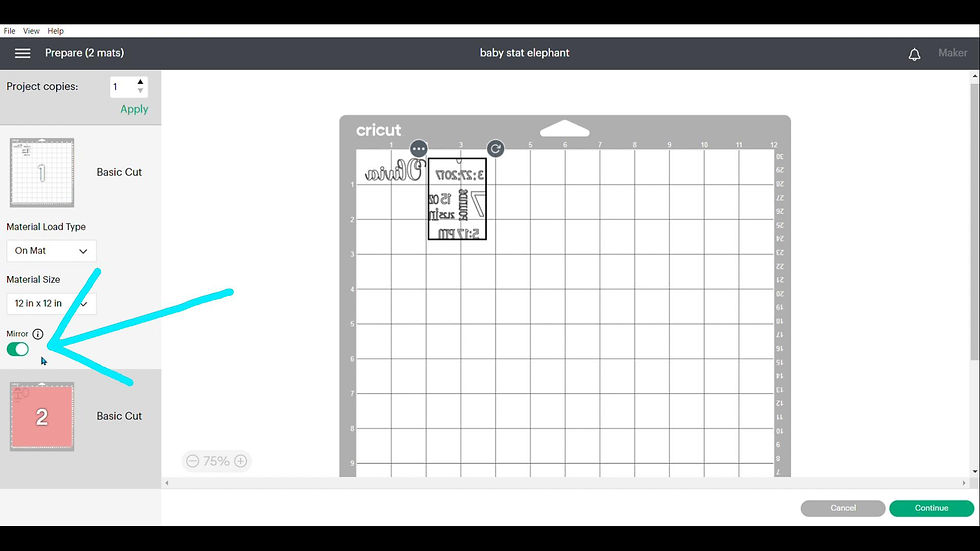
This next part is very important and easy to forget and trust me, you do not want to forget: In each of the sections for the different colors of htv on the left side of the screen, click the mirror button. If you don't mirror it, the letters will be backwards when you iron them on.

Now click the green continue button on the lower right side,
If you are using the Siser EasyWeed htv, my machine cuts best if I select Everyday Iron-On and then change the pressure to More instead of Default.
Once the arrow light is flashing on your Cricut, insert your mat with the htv on it under the rollers and press the flashing light. The machine will roll the mat in and the C Cricut button will begin to flash. Go ahead and press it and wait for the magic to happen.
Once it cuts your design, remove the entire sheet of htv from the mat and cut away any large chunks that didn't get cut to save the htv for another project.
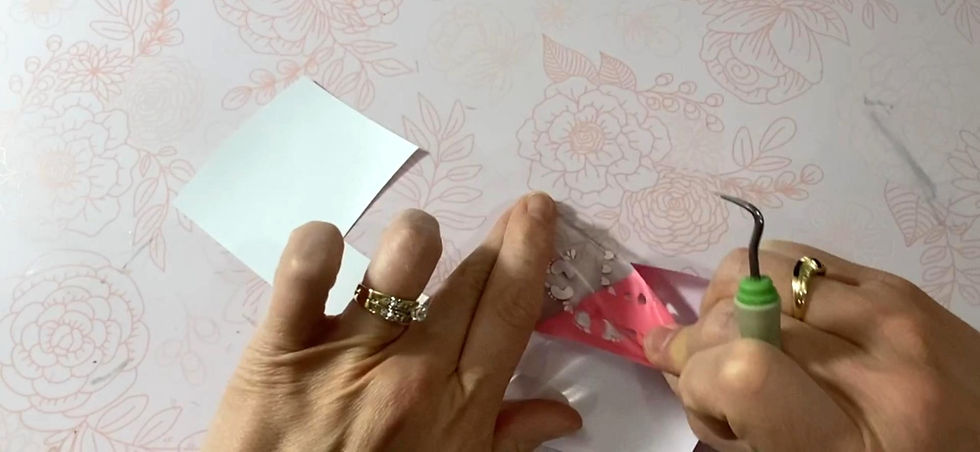
Then I put the cut piece back on top of the mat and use my weeding tool to remove the sections of htv I don't want such as the background and the centers of letters. You will be left with your design on the back of the clear carrier sheet.

Now all that’s left is to iron it onto your elephant!
I really love using the Cricut EasyPress Mini for this. That little press heats up fast and lets you have a lot of control over where you are heating. It’s perfect for small iron on projects like this. I set it on the second heat setting.
If you don't have an EasyPress Mini, you can also use a home iron. According to the Siser htv website, use it with no steam, set it between polyester and wool settings, and use a piece of parchment paper on top of the carrier sheet.

Place your elephant onto a heat safe surface such as a Cricut EasyPress Mat or ironing board. Now put your htv design onto the elephant’s ear and center it up so it looks nice.
Place the heated up EasyPress or iron on the top of the clear plastic htv carrier sheet and slowly move it around on the design.
Since you are layering colors of htv, just leave it on long enough for the vinyl to release from the carrier sheet. Don’t leave it in any one place for more than a few seconds because it will do the job quickly and if you leave it on too long it will melt your htv. That’s just an educated guess. It’s not as if I have done that . . .

Once you think you have heated the entire design, slowly peel up a corner of the carrier sheet. If your htv has transferred to your elephant continue peeling. If any parts are not yet transferred, replace the carrier sheet and heat it some more before peeling it off again.
Repeat with your second color of htv.

To make sure it is all securely ironed on, I place a piece of parchment paper on top of the design and iron over the entire thing one more time. I know I’ve got it completely done when I can faintly see the pattern of my fabric through the htv.
Be amazed at the fantastically personalized baby gift you have finished! To add the perfect final touch, attach this free adorable gift tag to your package.
Happy crafting!


Comments