.png)
Cozy Up Your Cup: How to Sew a Mug Rug You’ll Love to Use (and Gift!)
- Jul 19, 2025
- 4 min read
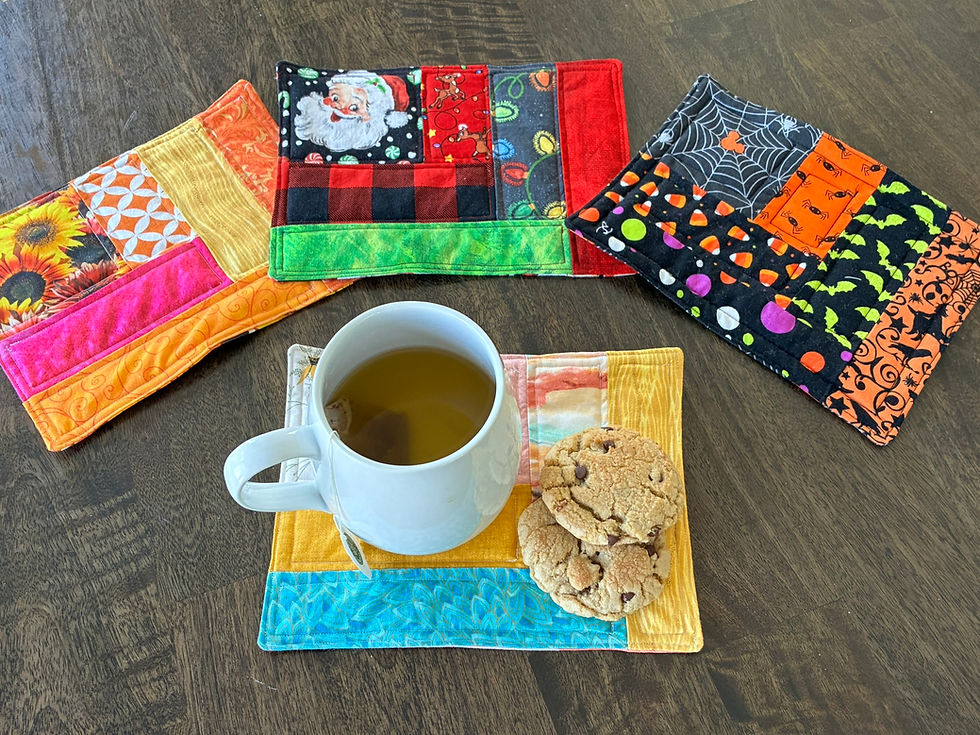
I love tea. I drink some every day, and it relaxes me and can be very tasty too. (Try Happy Lucky’s Tea if you haven’t already – everything I've ever tried is fantastic and I've tried a lot). Now, if you’re like me, one cup of tea is never enough. That’s where the mug rug comes in. If you’ve never heard of one, it’s like a coaster, but cooler. Why? Because it’s large enough not only for a cup of tea or coffee, but also for a snacky snack on the side—or yes, even two cups of tea. It’s a practical little piece of cozy that fits perfectly into a mindful routine, whether you’re reading, journaling, or working from home.
I’m stitching up a whole bunch of these for Christmas in July—it’s the perfect time to get a head start on handmade gifts without the end-of-year stress. Mug rugs are quick to sew, easy to personalize, and always appreciated by tea and coffee lovers alike.
Why Mug Rugs Are the Craft You Didn't Know You Needed
Sewing a mug rug is a quick, satisfying project that lets you play with color, texture, and pattern in a compact space. This pattern is extra awesome because it has no binding. It’s beginner-friendly, stash-busting, and—bonus—it makes a perfect gift. Pair one with your favorite tea and some cookies, and you’ve got a thoughtful, handmade present anyone would love.
If you plan to sell or gift them, don’t miss out on my free printable Mug Rug Tags to give your projects a professional finish and heartfelt touch.
Let’s get into the how-to, and don’t worry—I’ve made it as easy as sipping that second cup of tea.
Watch the video tutorial:
The Supplies You’ll Need
This post may contain affiliate links, which means at no extra cost to you I may receive a commission if you make a purchase through my links. Thanks for supporting handmade crafting!
Fabric Cuts (Cotton Woven in 6 Prints):
4” x 4” focal piece
2.25” wide x 4” high
2.25” wide x 6.25” high
2.25” wide x 8.5” high
6.25” wide x 2.25” high
8.5” wide x 2.25” high
Backing: 9” wide x 7” high
Other Pieces:
Cotton batting - 9” wide x 7” high
Tools & Notions:
Sewing machine
Matching or coordinating thread
Iron and ironing board
Optional but Helpful:
Inexpensive plastic cutting board (for template)
Free printable Mug Rug Tags — Download here
How to Sew Your Mug Rug

Start by laying out your six fabric pieces in order, from the 4” x 4” square out to the largest rectangle. I recommend cutting a square template out of inexpensive plastic cutting board material to help center the focal point of your first piece. It really helps line things up, especially if you're working with a patterned print.

Sew your fabrics together one at a time, starting with piece #1 and #2. Use a ¼” seam allowance and keep right sides facing each other.

Use an iron to press your seam to one side—I press mine toward the piece I just attached.

Next, sew the piece you just made to piece #3, again right sides together with a ¼” seam. Iron flat.
Keep following the pattern, adding one piece at a time in the correct sequence. Each new piece expands the mug rug outward, sort of like adding puzzle pieces.
Trim the excess fabric from each new sewn piece and once they are all attached, use your rotary cutter to carefully trim the entire piece to 9" x 7".
Time to make the sandwich: place one piece of cotton batting on your work surface, then the backing fabric right side up, then your mug rug top right side down. Secure all layers with sewing clips or pins.
Mark a 2-inch section along one edge where you’ll leave a gap for turning. Sew all the way around the edge with a ¼” seam allowance, skipping that marked section.

Trim the corners to reduce bulk, being careful not to cut into the stitches.

Turn the whole thing right side out through the hole and use a turning tool or blunt object to push the corners out nicely.

Fold the unsewn section’s edges inward to match the seam, then press the whole mug rug flat with your iron. Top stitch around the entire perimeter using a ⅛” seam allowance. This seals the opening and gives your mug rug a clean, finished edge.

At this point, you can stop—or add extra quilting lines along the seams to emphasize the patchwork look. It’s totally optional, but it does give it a more polished, quilted feel.
That’s It! Now Pour a Cup and Enjoy
You did it. You just made a beautiful, handmade mug rug—perfect for elevating your next tea break. Whether you use it yourself, gift it to a friend, or stock it in your shop, this simple project brings joy with every stitch.
Want to add that final touch? Download the free printable Mug Rug Tags to include with your gift or product listing. A little tag goes a long way in making your handmade work feel extra special.
If you're feeling inspired, make a few more in different color schemes. They sew up quickly and are great for holidays, birthdays, or just because.
And hey, don’t forget the tea—seriously, go check out Happy Lucky’s Tea. My current favorites are their Faux Coffee or Chocolate Chai. Sip, sew, repeat.
Happy crafting!


Comments