.png)
Sew Your Own Oven Mitts with This Fun & Functional Free Pattern
- May 10, 2025
- 4 min read

DIY Twilight-Themed Oven Mitts You’ll Actually Want to Use – Easy Tutorial + Free Pattern
My absolute favorite thing about crafting is customizing and personalizing the things I make. So, when my college-aged daughter asked for a set of oven mitts—and oh yeah, it would be awesome if they could be Twilight themed—I was overjoyed. Why? Because I knew what I made would be perfect for her. And since the Twilight books and movies came out an eon ago, it's not something you can just pick up at Target. That makes it even better.
In this post, I’m going to walk you through how to sew your own personalized oven mitts using a free printable pattern. Whether you want Twilight, tacos, or tiny tigers on your mitts, this project is fun, easy, and totally customizable.
Ready to craft something unique and functional? Keep reading—and don’t forget to grab the free pattern and supply links below!
Watch the video tutorial:
🧵 Why Make Your Own Oven Mitts?
Store-bought oven mitts can be, well… boring. And if you’ve got a favorite theme, character, or fabric that sparks joy, why not use it to brighten up your kitchen? Homemade oven mitts are:
Customizable – Use any fabric to match your kitchen or personality
Eco-friendly – Sew with sustainable materials like 100% cotton
Perfect for gifts – Great for holidays, birthdays, or just because
✂️ Supplies You’ll Need
This post contains affiliate links. If you click and purchase, I may receive a small commission at no extra cost to you.
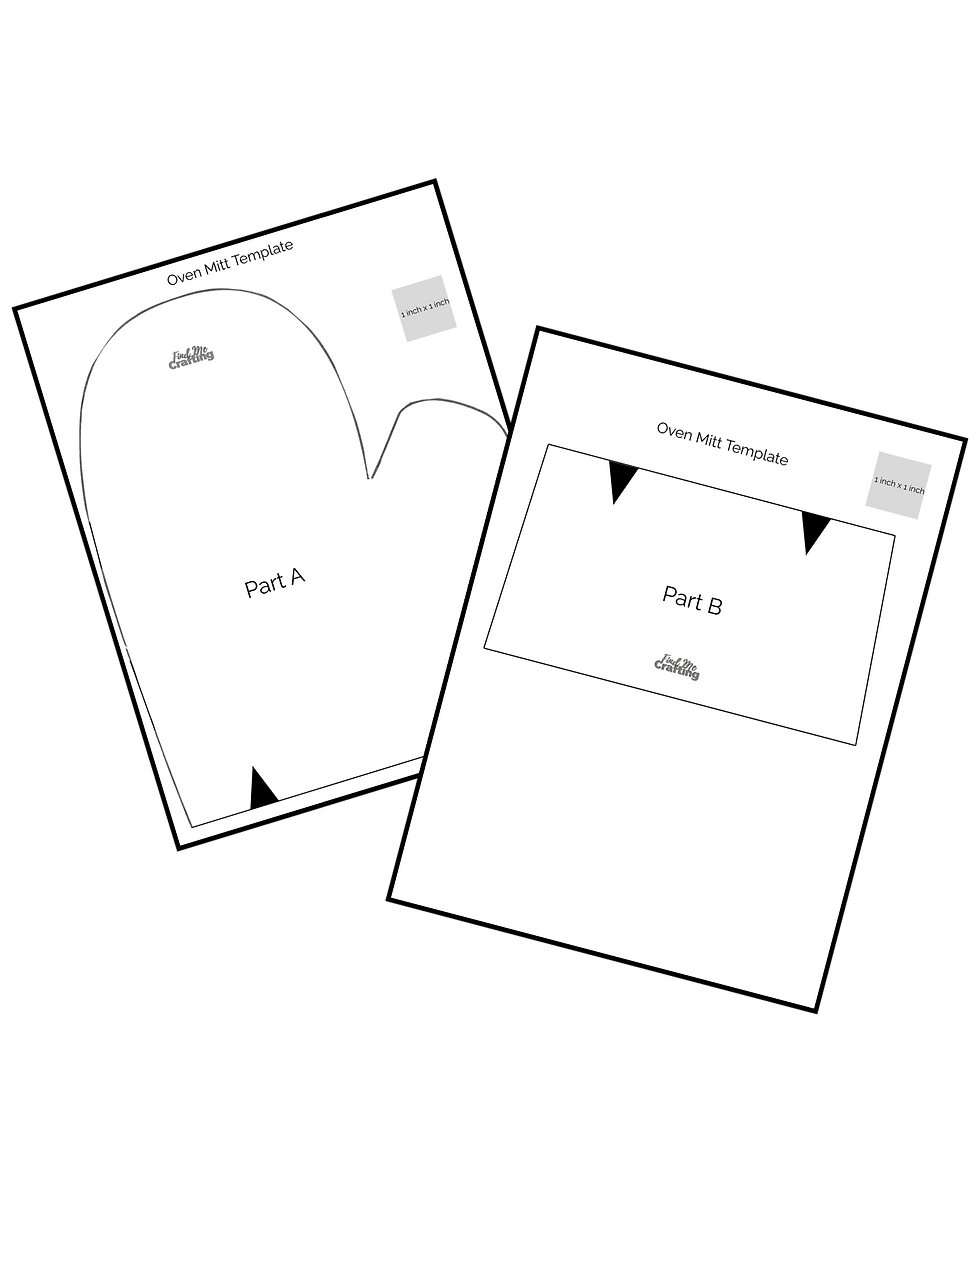
Free sewing template (make sure to print at “actual size”)
Two 10” x 15” pieces each of:
From the interior fabric, also cut:
2 strips: 2 ¼” x 17” for binding
1 strip: 2” x 5” for hanging loop
Sewing machine
Sewing clips or pins
Iron and ironing board
Tape measure
Optional but helpful:
Walking foot for easier quilting
🧷 Step-by-Step: How to Sew an Oven Mitt
1. Print & Prep the Pattern
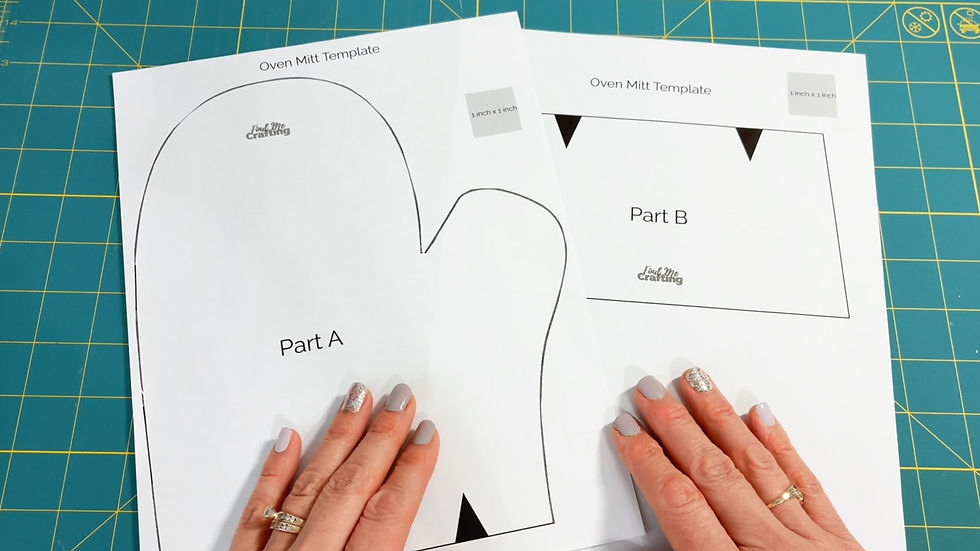
Print the free template at 100% scale ("actual size"). Confirm scale using the 1" x 1" gray boxes. Cut and tape pattern pieces A and B together.
2. Create the Hanging Loop
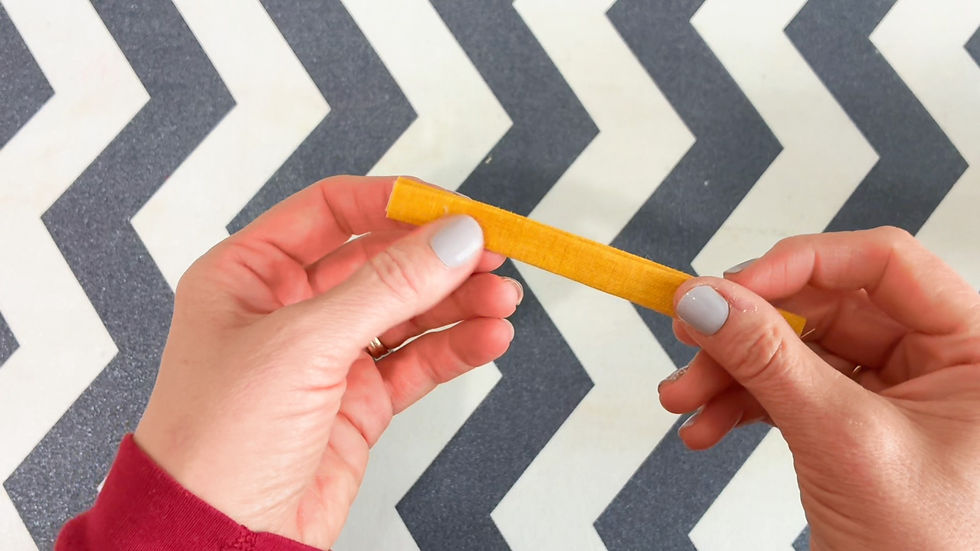
Take your 2” x 5” strip and press it:
Fold in half lengthwise and iron.
Open, fold long edges to center and press again.
Fold shut along the center and press one last time.
Stitch closed along the open edge with a 1/8" seam allowance.
Set aside for later.

3. Prepare Binding Strip
Press your 2 ¼” x 17” strip in half lengthwise. This will bind the bottom of the mitt.
4. Layer and Quilt the Fabric Sandwich
Layer in this order:
Exterior fabric (right side down)
Cotton batting
Insul-Bright (no right/wrong side)
Interior fabric (right side up)
Baste layers by stitching a 1/8" seam along top and bottom edges.
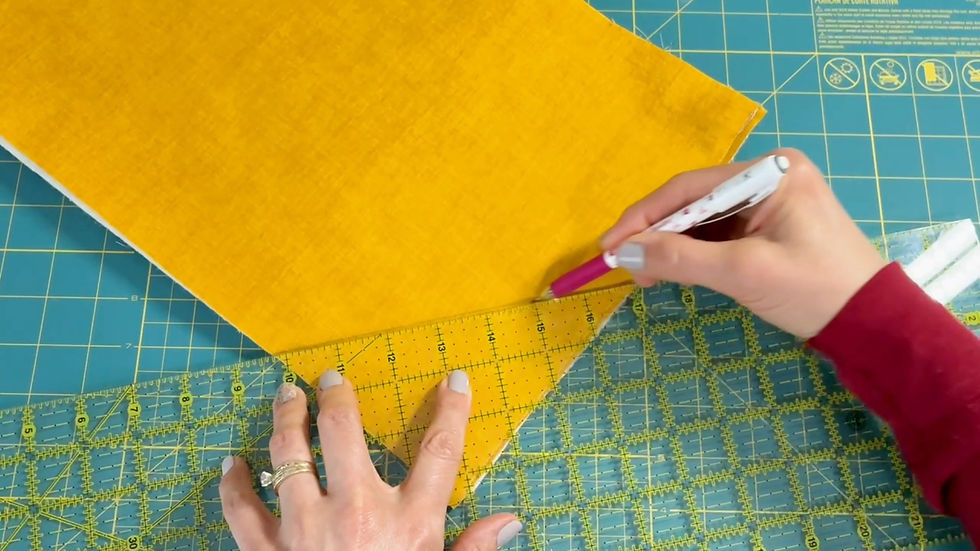
Mark quilting lines using a fabric pencil. I start 1 1/2" from the corner and then mark lines every 2" with a sewing ruler, diagonally.

Quilt along marked lines—sew only in one direction to prevent puckering (start from one side, sew to the opposite side, cut threads and then return to the first side to begin the next line.)
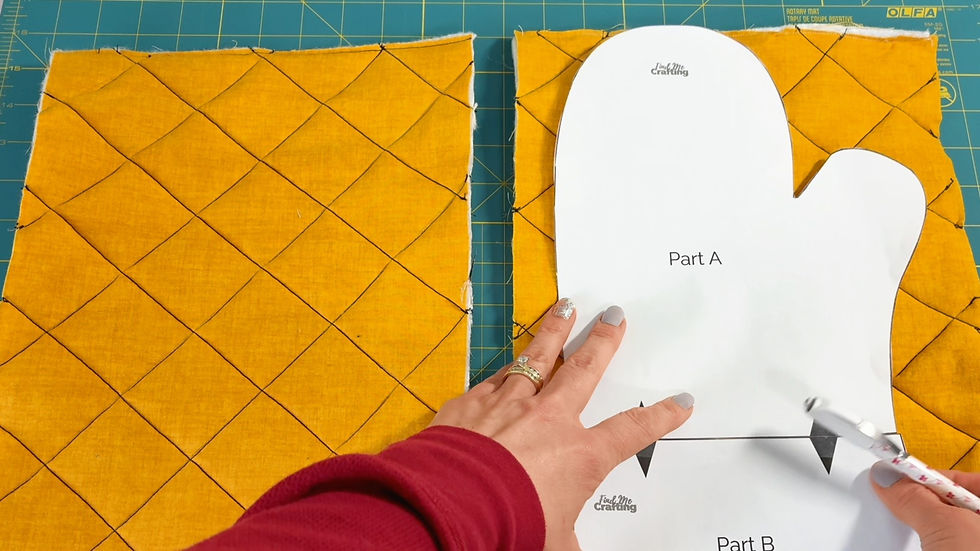
5. Cut Out the Mitts
Trace the oven mitt pattern on the interior side of your quilted fabric.

Flip the template to mirror it for the second mitt.

Cut both out and clip or pin together with right sides facing.

Sew with a 1/4” seam allowance around the mitt, leaving the cuff open.
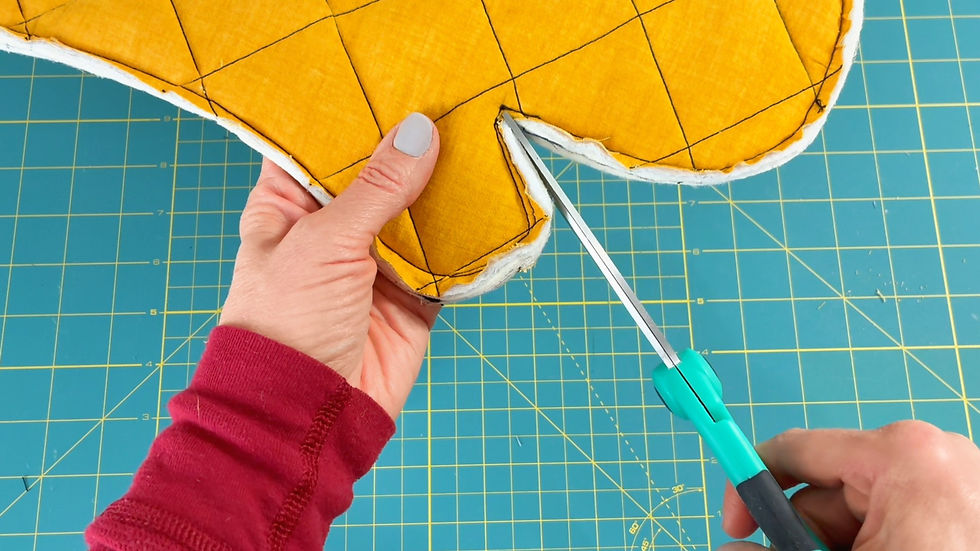
Snip a notch at the curve between the thumb and mitt body to reduce bulk.
6. Attach the Binding
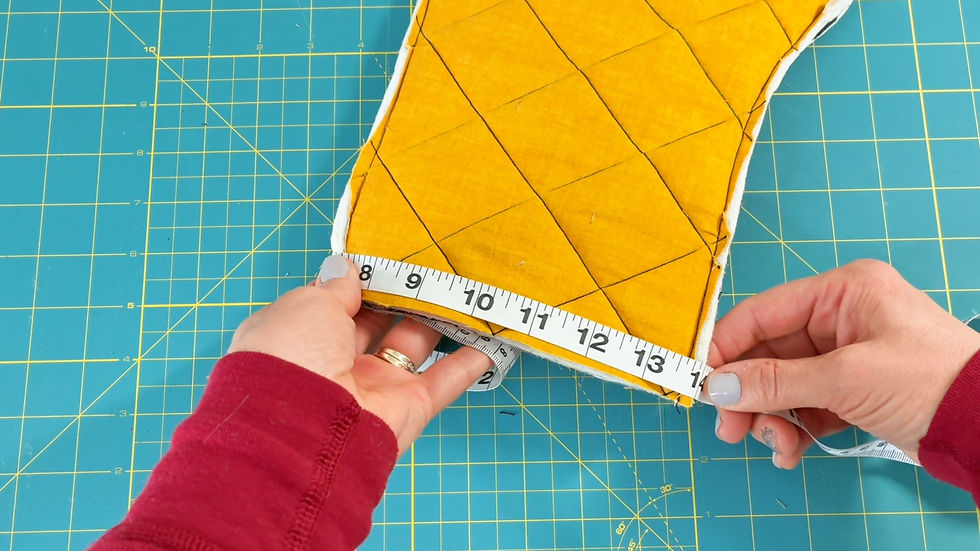
Measure the cuff opening, add 1/2", and trim your pressed binding strip to size.

Sew short ends of the binding strip together (right sides facing) and press the seam open. Fold the entire loop wrong sides together.
Slide the binding loop over the cuff, raw edges aligned. Clip and sew with a 1/4” seam.

7. Turn & Finish
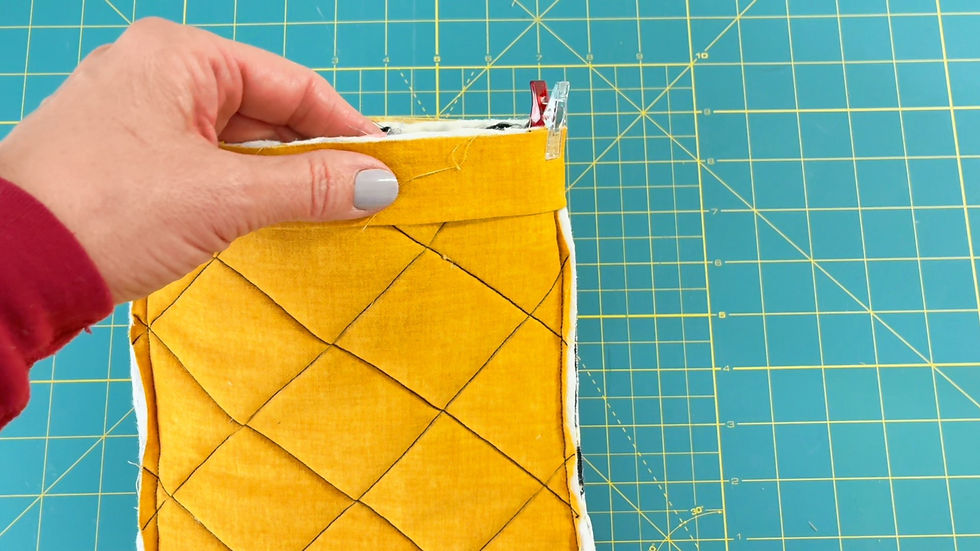
Turn the mitt right side out. Fold the binding over the raw edge and clip in place.
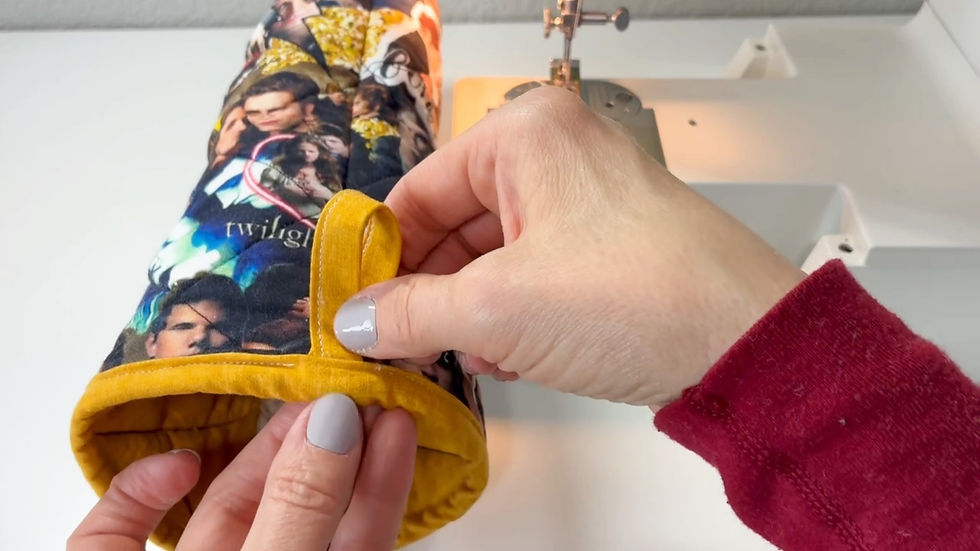
Insert the loop: Fold it in half and tuck into the binding at one of the side seams.

Topstitch all the way around the binding, securing the loop and the edge.
🧤 Boom! Your Oven Mitt is Done.
You just made a completely custom, insulated, washable, and totally you oven mitt. Whether you're baking cookies, cooking up dinner, or gifting a pair to a Twilight-loving friend, this project is sure to become a favorite.
✅ Quick Tips for Success
Always use 100% cotton materials for safety—polyester can melt!
Quilting before cutting the mitt shape keeps everything even.
Don’t rush the binding—pressing and pinning or clipping makes a huge difference.
📥 Get the Free Pattern + More DIY Ideas
👉 Click here to download the free oven mitt template👉 Want more fun, practical sewing projects? Subscribe to my email list for weekly tutorials, freebies, and behind-the-scenes fun!
🎯 Final Thought
Why settle for generic kitchen gear when you can make something personal, useful, and awesome? Whether you go full fandom like I did or pick a fabric that matches your kitchen vibe, sewing your own oven mitt is satisfying and simple.
So grab your fabric, fire up that sewing machine, and start stitching! Your kitchen (or gift list) will thank you.
Grab your free oven mitt template here:


Comments