Time to attach Cuddle Buddies blocks and make the base of a baby blanket
- Nichole Jensen
- Feb 3, 2024
- 4 min read

Hopefully you have all the squares/blocks you will need to crochet the Cuddle Buddies Blanket. If not, you can find the pattern here. Next up - joining all the blocks together. Since most of the animals on the blanket have their paws/hooves on the join areas themselves (in order to look like they are peeking out of the blocks), you have to join all the blocks BEFORE adding the animals.
This part is very satisfying because the project takes on the actual blanket shape but doesn’t take very long to complete. I saw a join like this for the first time here at Repeat Crafter Me and fell in love with it. Let's jump right into it!

You can watch a video tutorial here:
Supplies:
This post may contain affiliate links which means at no extra cost to you I may receive a commission if you decide to make a purchase through my links.
30 squares/blocks – pattern here
G 4 mm hook (the same hook used to make all the blocks) - these are my absolute favorite hooks
Size 4 worsted weight yarn – I used Hobby Lobby’s I Love This Yarn in White to join the blocks
Let's begin joining Cuddle Buddies Blanket blocks:
If you’re ready to move to the next step in making the Cuddle Buddies Blanket you should have all of your squares/blocks ready to go. For me this was a total of 30 blocks and here is the breakdown by color (all the yarns I used are colors of Hobby Lobby's I Love This Yarn):
7 of Sea Blue
7 of Stonewash
8 of Dark Country Blue
8 of Sungold
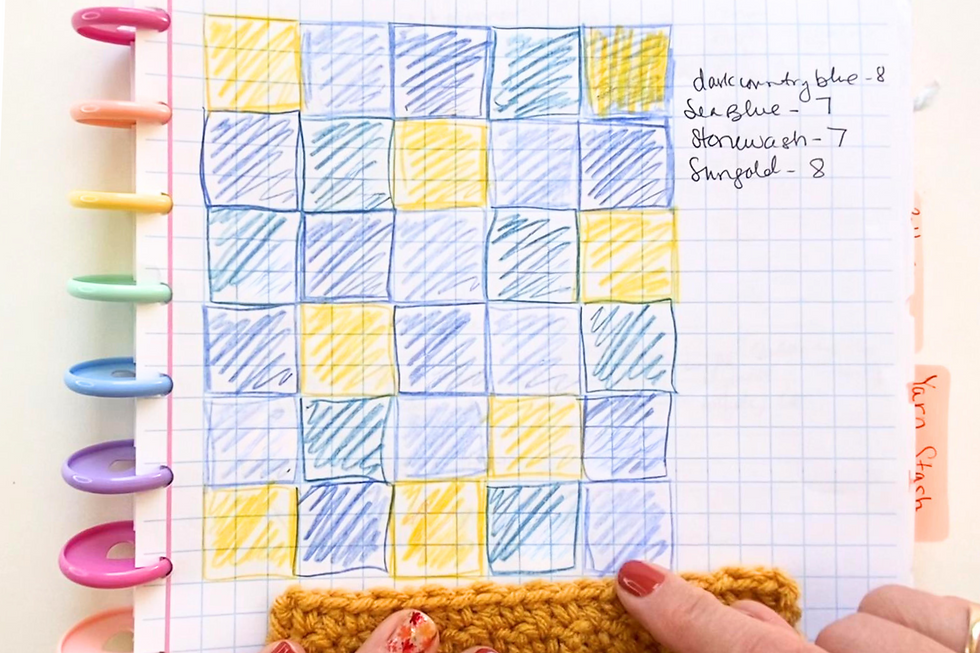
Before you join anything, I HIGHLY recommend you lay out all the blocks and figure out where you want to put them. You can move things around and make sure you like the way everything looks before the next step. I used graph paper and colored pencils to make myself a chart so I could refer back to it. This particular graph paper is part of the Printable Crochet Planner I have available here.
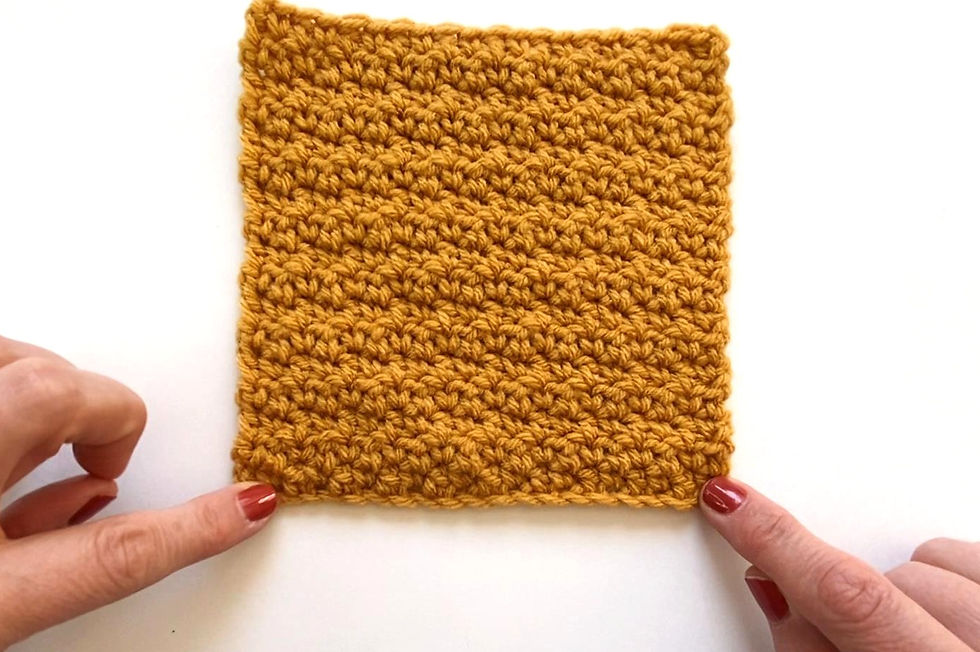
Now it’s time to start connecting blocks. Keep in mind that there is a right side and wrong side to each of your blocks. Make sure that you are using the same side consistently so the blanket looks uniform.
And pay attention to the top and bottom of each block. You started each block with chains so the bottom of the block has a row with one unworked loop of that starting chain.
Whichever way you choose to position your blocks, do it consistently.

Going forward I will be describing blocks in rows (going from right to left on the blanket), and columns (the blocks from the bottom to the top of the blanket). And when I describe rows or columns I number them working from the right to the left. So the block in the far right-hand corner would be block 1, in row 1, and column 1. Make sense?
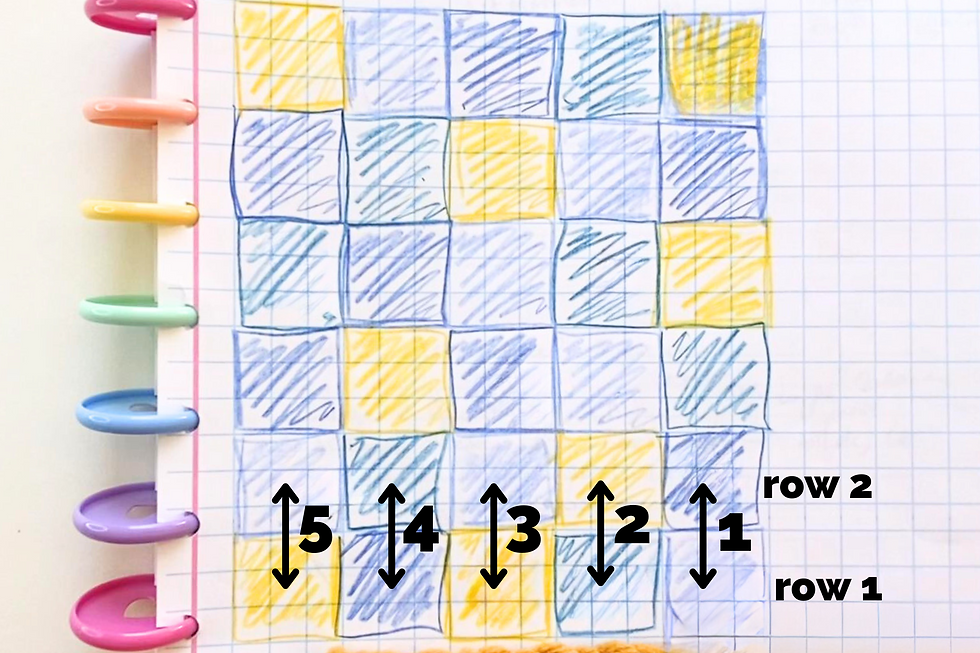
Using Hobby Lobby’s I Love This Yarn in White and a G 4 mm hook, start with the block in the lower right corner of your blanket and join it to the block from the second row that will be directly above it. This would be block 1 from both row 1 and row 2. My pictures show the joining of blocks from a different portion of the blanket so don't be thrown off by the colors that don't match my chart.
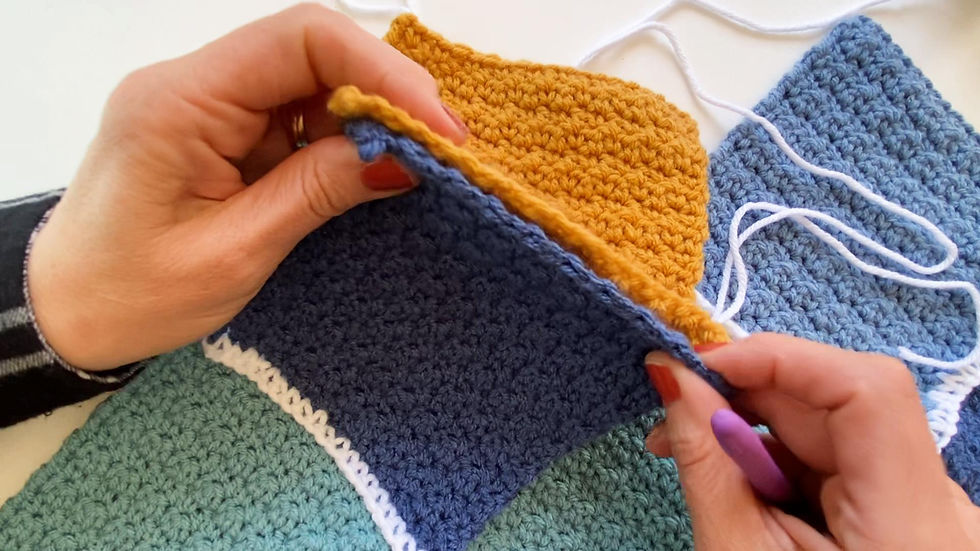
Place the two blocks wrong sides together (the backs of both facing each other).

Attach the White yarn with a slip stitch under the far-right stitches of both blocks. In the same stitch, single crochet under both loops of each of the two blocks. Continue doing single crochets through both blocks until you reach the left side.
WITHOUT CUTTING YOUR YARN OR TYING OFF, begin single crocheting the next two blocks together. These would be the second blocks from both the first and second row. There will be a slight gap in the single crochets between the second blocks and the first blocks, but it will be covered later so no need to worry about it.
Continue single crocheting blocks from rows one and two until they are finished.

Then attach blocks from row 2 to row 3, row 3 to 4 and so on until all the rows are attached. This leaves the columns unattached to one another.
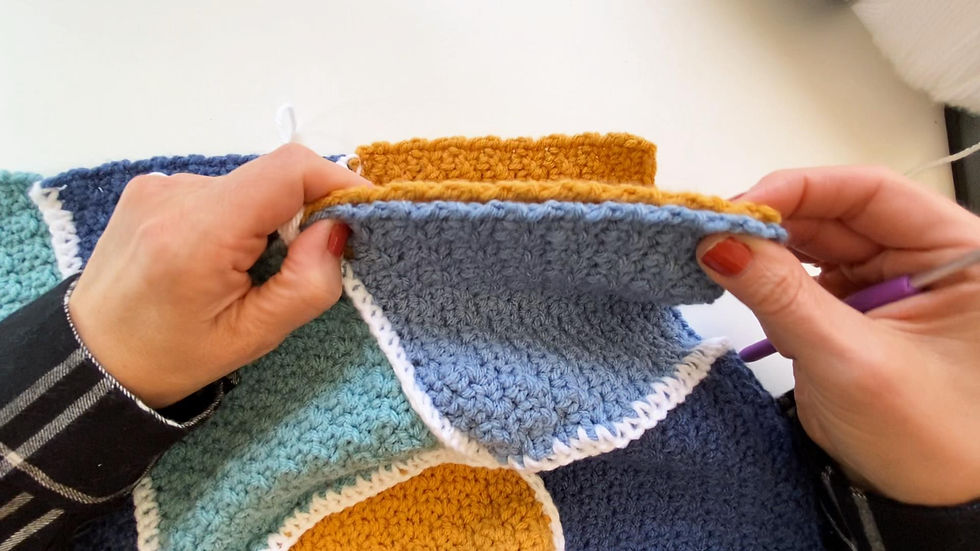
Now place blocks from the first column back-to-back with blocks from the second column beginning at the top of the blanket and single crocheting toward the bottom.
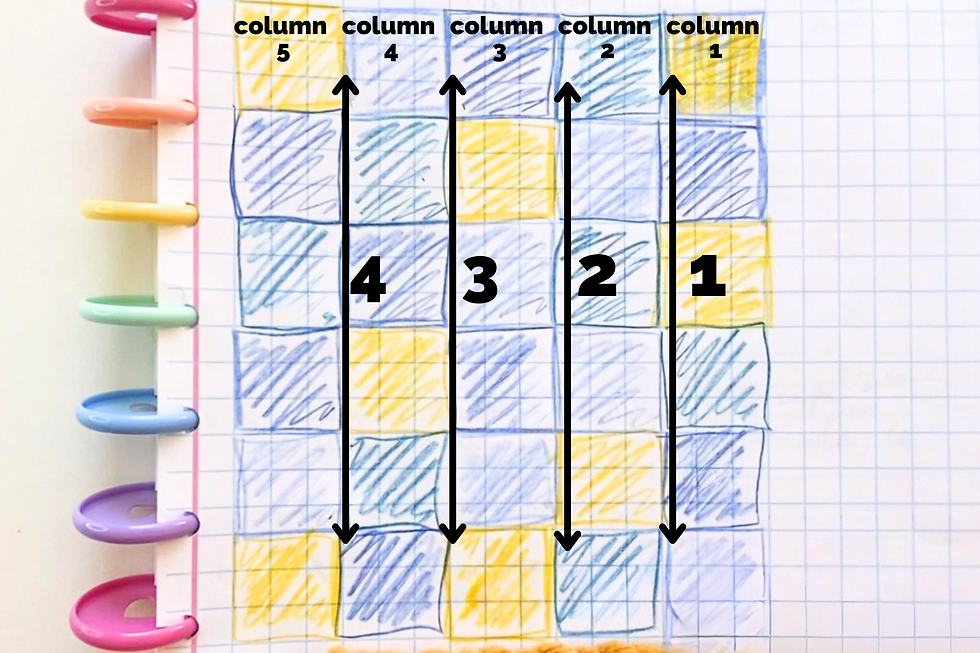
After joining columns 1 and 2 move on to joining 2 and 3 and so on.

When you come to an “intersection” where two blocks are joined, place a single crochet just before the join and one just after and continue on without stopping or cutting off your yarn.
Once you finish these steps your blocks will all be joined together! We aren’t going to work on the border yet. That will be the last step in the blanket-making process.
Next month we can begin adding in adorable animal appliques!
And if you haven’t already, don’t forget to subscribe so you know when new patterns come out.
Happy crafting!
This pattern MAY NOT be copied, reproduced, altered, published or distributed in any way. You MAY sell finished products made with this pattern, but please credit me (Find Me Crafting).
.png)


Comments