The Cutest Crochet Animals Can be Made Into Christmas Ornaments
- Nichole Jensen
- Oct 26, 2024
- 6 min read
Updated: Nov 1, 2024

I was thinking about all the Christmas ornaments I wanted to crochet this year, and an idea hit me square between the eyes - what if I could turn the Cuddle Buddles Baby Blanket appliques into ornaments?! I played around with three of the appliques and realized that with very few modifications, I could create some of the cutest darn ornaments ever.
The patterns for the ornaments are almost the exact same as the appliques, just made with a smaller crochet hook. The tutorial below has pictures detailing how to create the koala ornament along with pictures of the process. Refer back to these pictures for the monkey and the sloth for the steps to attach the head pieces and create a hanging loop.
Let's jump right in!
Watch the video tutorial:
Stitch Abbreviations:
mc – magic circle
ch - chain
sl st – slip stitch
sc – single crochet
Cuddle Buddies Koala Ornament Pattern:
Find the full free koala pattern here complete with a video tutorial.

Additional Supplies to Crochet the Koala Ornament:
This post may contain affiliate links which means at no extra cost to you I may receive a commission if you decide to make a purchase through my links.
Printable ad-free pdf of pattern with ornament modifications
Poly-fil stuffing
Sport weight (size 3) white yarn for the eye whites - I used I Love This Yarn Sport Weight in White
Stitch markers - You can even make your own with beads.
Instructions to Crochet a Koala Ornament:
Using an E 3.5 mm hook:
Make two head pieces.

Make two ears – finish both through row 3 and stop. Make one with the written instructions for using White and Grey Beard, and one in all Grey Beard.
Place the wrong sides of both ears together and sc both ears together with the Pipsqueak Elephant Gray yarn in the 12 stitches along the tops of the ears. Do not place any stitches in the bottom straight sections of the ears.
Attach the nose to the middle of one of the head pieces.
Use sport weight white yarn to create a line under the koala’s nose.
Use Black yarn and a yarn needle to embroider the mouth two rows beneath the nose.
Attach safety eyes to the left and right sides of the nose so the top of the eye lines up with the top of the nose.
Use White yarn to add the eye whites around each eye.

Lay out the face piece and the ears and place them where the ears look good with eight stitches empty between them. Use a stitch marker to mark where the first stitch would be on the far right edge of the right ear. Next place a second stitch marker in the stitch at what will be the right side of the left ear.

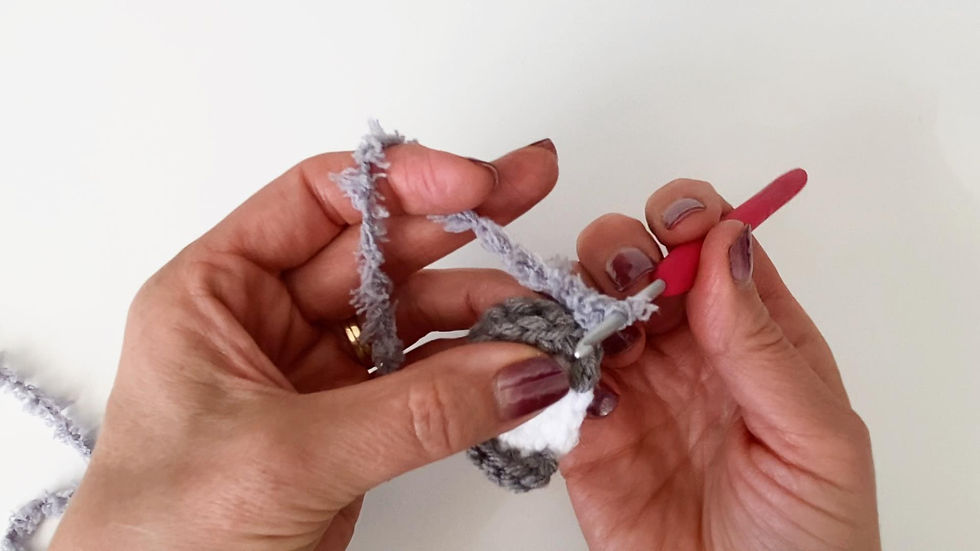
Attach Grey Beard yarn at the lower right corner of the head and sc through both head pieces until you come to the first stitch marker. Remove the stitch marker. Slip stitch through the front of the head, both the front and back of the ear, and the back of the head seven times. This attaches both the front and back of the head as well as the ear.
Sc in the eight stitches between the two ears and then slip stitch through the second ear just as you did the first.

Continue single crocheting through the front and back of the head until you have a 2-inch gap remaining open. Pause and use Poly-fil to lightly stuff the koala’s head. Sc through the remaining stitches of the front and back of the head, sl st to the first sc and finish off.

Weave in the ends.
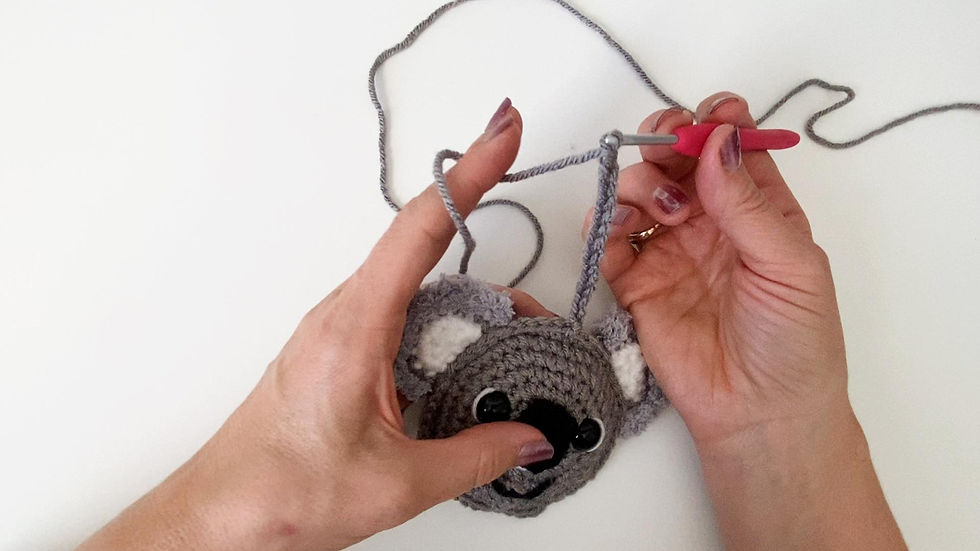
Add a hanging loop: Attach Grey Beard yarn at the top center stitch, ch 15, sl st to the same stitch as the join.
Tie the starting and finishing tails together and weave in the ends.
Cuddle Buddies Monkey Ornament Pattern:
Find the full free monkey pattern here complete with a video tutorial.

Additional Supplies to Crochet the Monkey Ornament:
Poly-fil stuffing
Sport weight (size 3) white yarn for the eye whites - I used I Love This Yarn Sport Weight in White
Instructions to Crochet a Monkey Ornament:
Using an E 3.5 mm hook:
Make two head pieces.
Make two ears –Make one with the written instructions for using Ivory and Latte. Make a second ear only through row 3 with just Latte yarn and leave a long tail when you finish off. Place the wrong sides of both ears together. Use the long tail to sew the ears together.
Attach the muzzle and eye/face pieces to one of the heads.
Attach the safety eyes in the eye/face piece.
Use Black yarn and a yarn needle to embroider the mouth onto the muzzle.
Attach Latte yarn and sc through both head pieces but leave a 2-inch gap open.
Use Poly-fil to lightly stuff the monkey’s head. Finish single crocheting through the two pieces.
Attach Latte yarn to each of the combined ears and sew them onto the head leaving 15 stitches empty between them.
Finish off and weave in all the ends.
Add a hanging loop: Attach Latte yarn at the top center stitch, ch 15, sl st to the same stitch as the join.
Cuddle Buddies Sloth Ornament Pattern:
Find the full free sloth pattern here complete with a video tutorial.

Additional Supplies to Crochet the Sloth Ornament:
Printable ad-free pdf of the sloth applique pattern with ornament modifications
I used Hobby Lobby’s I Love This Yarn in Coffee for the eye area which is different from the yarn I used on the sloth applique.
Poly-fil stuffing
Sport weight (size 3) white yarn for the eye whites - I used I Love This Yarn Sport Weight in White
Medium weight size 4 yarn for the hanging loop - I used I Love This Yarn in Light Taupe
Using an E 3.5 mm hook:
Make two head pieces with either I Love This Yarn in Toasted Almond, or Premier Little Bunny in toffee.
Make one face piece with I Love This Yarn in Ivory leaving yourself a long tail when you finish off.
Make two eye areas with either I Love This Yarn in Cinnamon or Coffee (I used Coffee for the with the Little Bunny yarn.)
Make a nose with Black yarn and a B 2.25 mm hook: Mc and place 1 sc, 1 hdc, 1 sc, 1 hdc in the circle, sl st to the first sc (4). Tighten the mc and finish off leaving a long tail to attach the nose to the face. Weave in the starting tail.
Attach the safety eyes to one end of each of the eye areas.
Use White sport weight yarn to add eye whites.
Attach the eye areas to the face piece.
Use the long tail to attach the nose to the face placing it below and centered to the eye areas.
Use Black yarn and a yarn needle to embroider a mouth onto the face piece.
Use the long tail from the face piece and a yarn needle to sew the face to one of the head pieces.
Attach Toasted Almond or Little Bunny Toffee yarn and sc through both head pieces but leave a 2-inch gap open.
Use Poly-fil to lightly stuff the sloth's head. Finish single crocheting through the two pieces.
Finish off and weave in all the ends.
Add a hanging loop: Attach coordinating yarn at the top center stitch, ch 15, sl st to the same stitch as the join. I used I Love This Yarn in Light Taupe to make the hanging loop to match the Little Bunny Toffee.
I hope you have as much fun as I did making these ornaments. Happy crafting and don't forget to subscribe so you're notified when new free patterns are released!
This pattern MAY NOT be copied, reproduced, altered, published or distributed in any way. You MAY sell finished products made with this pattern, but please credit me (Find Me Crafting).
.png)


Comments